jocel JDE011121 DEHUMIDIFIER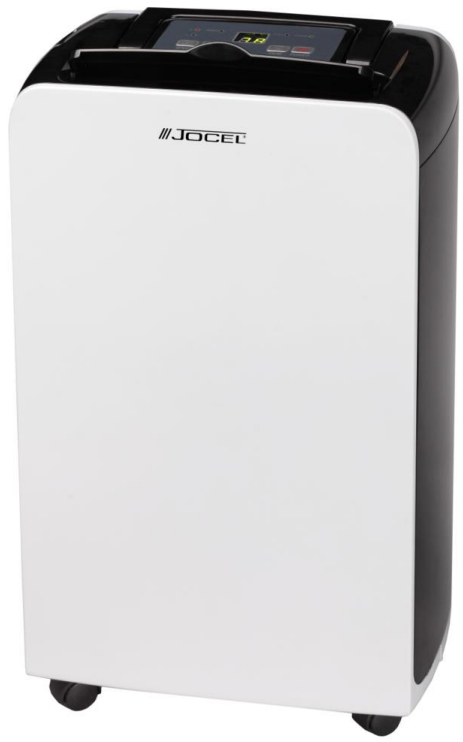
jocel JDE011121 DEHUMIDIFIER User Manual.
CAUTIONS
- Install the unit on the flat and hard floor to diminish vibration or noise.
- Never immerse the unit in water or other liquids.
- Never operate the unit if the cable or other connector is damaged, or something abnormal happens, please call customer service for help.
- Disconnect the unit from the power supply when it is not in use, or before relocating or cleaning it.
- Operate the unit only at the voltage specified.
- The unit is for indoor use only. Don’t use it for other purpose.
- Do not put heavy objects on the appliance.
- Do not tip the unit to any side as spilt water could damage the appliance.
- Never insert any other object into the unit body to avoid any hazard or unit failure.
- Do not put the unit close to heat-generating devices or near flammable and dangerous materials.
- This appliance is not intended for use by persons (including children) with reduced physical, sensory, or lack of experience and knowledge unless they have been given supervision or instruction concerning the use of the appliance by a person responsible for their safety. Children should be supervised to ensure that they do not play with the appliance.
- If the supply cord is damaged, it must be replaced by the manufacturer or its service agent or a similarly qualified person to avoid a hazard
- The appliance must be positioned so that the plug is accessible
- The appliance shall be installed according to national wiring regulations
- The ambient temperature range for the appliance is 5°-35°.
- jocel JDE011121 DEHUMIDIFIER User Manual.
Don’t try to repair, dismantle, or remold such an appliance, or it may cause some damage. Even the change of power cord should be done by a specially qualified person.
INSTALLATION
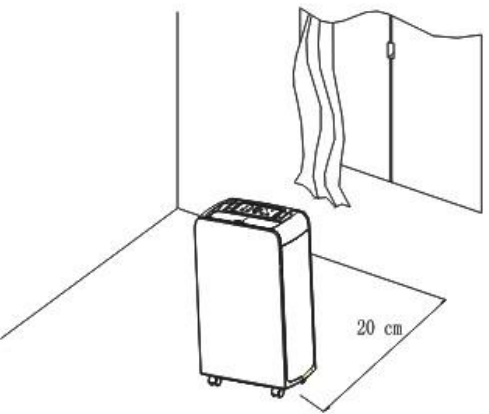 Install the unit on hard & flat floors, and keep the room ventilated. Leave at least 20cm of space around the unit (when the hose is not connected).
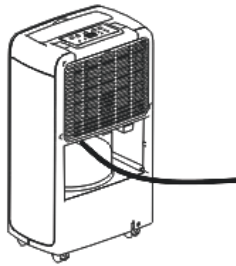
- Push the rubber adaptor of the water pipe on the drainage port of the rear panel. Please refer to the following picture.
- Connect the water pipe to the bathroom, outdoors, or a container, such as a bucket.
NOTE:
- Do not block the drainage port or water pipe.
- Do not fold the water pipe or make it 1.5m higher than the bottom of the unit.
- Do not replace the rubber adaptor of the water pipe, it’s a special accessory for the unit only, other adaptors may not fit the unit. If it’s damaged or lost, please call customer service for a replacement.
Note: Before connecting the dehumidifier, open the louver of the ventilation opening by pressing slightly on the back of the louver and lifting the front.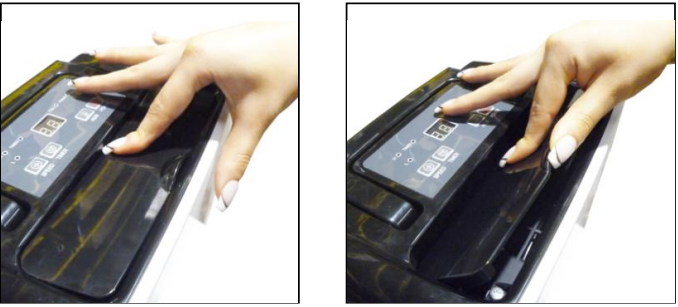
PARTS
Front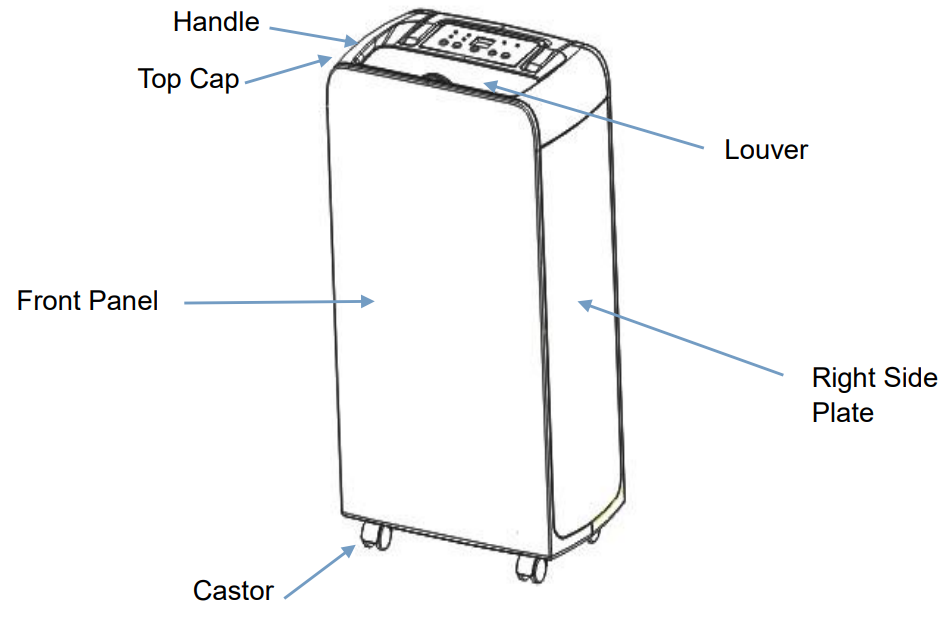
Back
OPERATIONS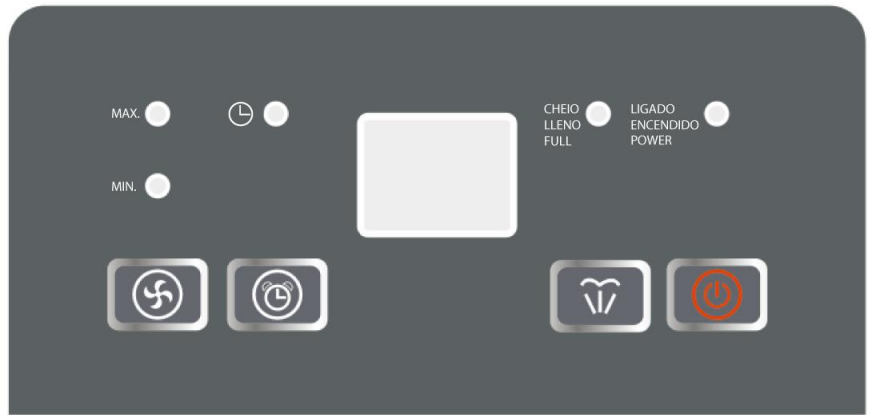
Indication
- Power Indication When power is on, whether it is running or not, the power indicator shows green.

- Water full indication When the water tank is full, the indicator light shows red and the unit will bizz 15 times and then stop. You must empty the water tank and put it back in to correct position.

- Timer indication When the time is on or the timer is off, the indicator light shows green.

- Low fan speed indication When running at low (MIN.) fan speed, the low fan speed indicator shows green.

- High fan speed indication When running at high (MAX.) fan speed, the high fan speed indicator shows green.

- Display This indicator with 3 functions as below:
- When the power is on, it shows indoor humidity.
- When you adjust humidity, it shows the selected humidity data.
- When the timer is on/off, it shows the timer data.
Control Panel
- Power Press this button to turn on /off the unit. Do not unplug the power cord directly to force the machine to stop working directly. For first use, when plugging the unit the buzzer would sound bizz. Press o turn on the unit and the primary humidity is 50%, also with low fan speed.

- Timer button 24-hour timer Press this button to set the timer on/off, if you would like to cancel the timer setting, press this button to 00 shown from the display.

- Humidity setting button Press this button to adjust humidity as follows (The initial humidity is 50%), from 50%→ 55%→ 60%→ 65%→ 70%→ 75%→ 80%→ 40%→ 45%→ 50%. When the indoor humidity is lower than the set humidity, the machine would stop automatically

- Fan speed setting button Press this button to adjust the fan speed between Maximum and minimum fan speed.
WATER DRAINAGE
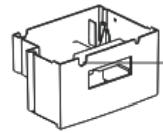
Water Tank
The Water full indication will show red when the water tank is full, a warning will be given when capacity 1.5L has been reached. Take out the water tank, and empty the water inside. Put the water tank back into the dehumidifier
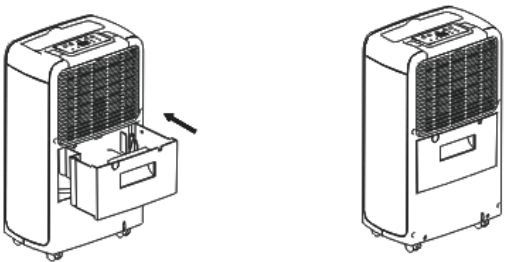
How to empty the water tank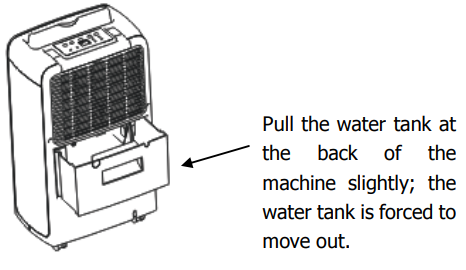
- Pull out both sides of the water tank as below.
- Empty the water tank.
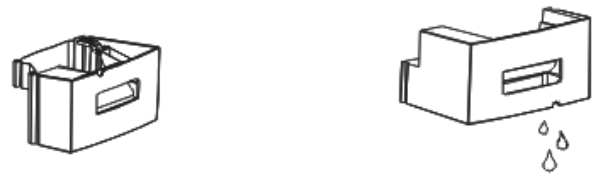
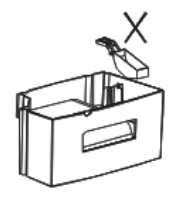
Cautions!
- Do not remove the float from the water tank; otherwise, the machine will not stop working when the water tank is full. Then the water will overflow which may cause damage to your floor.
- Drain the water collection tank completely when the water tank is full and reset your setting.
- If the water tank is dirty, clean by cool water or warm water, cannot use cleaner, steel wool, chemical rag duster, gas oil, benzene, thinner, or other solvent to clean it, otherwise, it would damage the water tank and lead to leakage
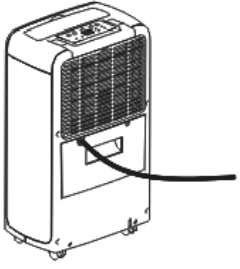
Continuous drainage
- Open the cover on the back of the dehumidifier.
- Take out the water tank
- Insert a PVC pipe with 9.5mm(inner diameter 9.5mm), and the recommended length is 300mm; put the other side into a container, such as a bucket.
NOTE: PVC pipe is excluded, need to buy separately.
Step: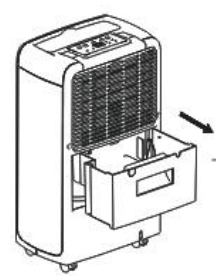
- Take out the water tank.
- Remove the plastic at the water level and place
- Insert the pipe into the hole of the water outlet port
- Put the drain pipe in the specific location
Caution:
- Never block the water outlet or the pipe, water will flow into the water tank if it is blocked.
- Never bend the drainage pipe and be always lower than the outlet.
- Must close the cover when no need for continuous drainage.
MAINTENANCE
NOTE: TURN OFF THE UNIT AND UNPLUG IT BEFORE ANY MAINTENANCE OR REPAIR TO AVOID ELECTRIC SHOCKS.
Cleaning
Unplug the unit before any cleaning. Clean the housing with a soft moisture cloth. Do not use chemical solvent químicos (such as benzene, alcohol, or gasoline). The surface may be damaged or even the whole case may be deformed. Do not sprinkle water on the unit.
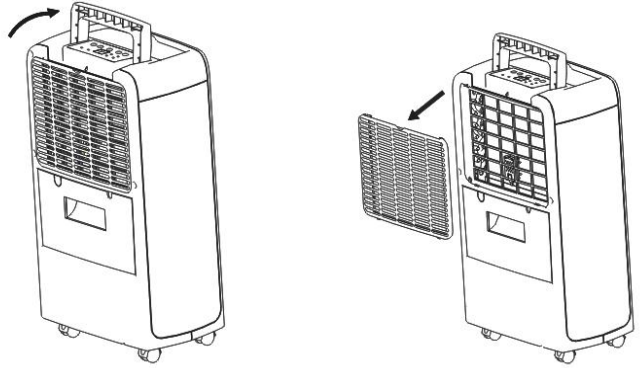
Aire filter
The unit is equipped with washable air filter. Take out the washable filter. After the cleaning operation, insert the filter back into its place. Clean the washable filter every 2 weeks. If the filter is blocked with dust, the efficiency will be reduced. Wash the air filter by immersing it gently into warm (about 40°) water with a neutral detergent, rinse it, and try it thoroughly in a shaded place.
- Take out the filter
- Clean the filter
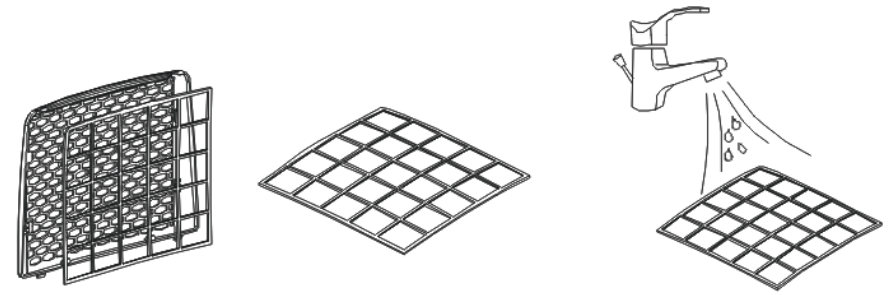
- Assemble the filter Insert the filter back into the machine slowly after washing.
Dehumidifier storage
If the dehumidifier will not be used for an extended period:
- Drain the water tank completely and make sure no more water is stocked inside.
- Unplug the unit and fold up the power supply cord.
- Remove and clean the air filter, allow it to dry completely, and reinstall it.
- Store the dehumidifier in a cool, dry location, away from direct sunlight, extreme temperature, and excessive dust.
TROUBLESHOOTING
BEFORE CALLING FOR SERVICE
Before contacting professional service, review this list. It may save you expenses and time. This list includes common occurrences that are not the result of a defect in workmanship or materials.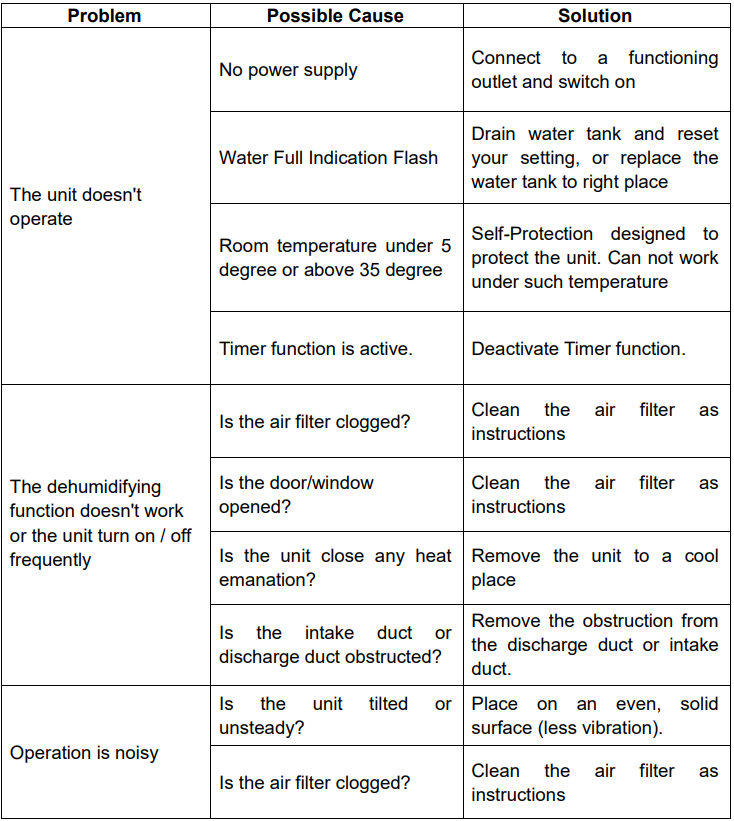
Auto Defrost, Low temperature work
- 5℃ ≤ temperature ≤ 12℃, the machine would defrost automatically every 30 minutes
- 13℃ ≤ temperature ≤ 20℃, the machine would defrost automatically every 45 minutes
Note: If the water full indication is often on, there may be some malfunction in the unit. Contact a service professional for help.
Cautions: Switch off the unit and unplug it immediately if anything abnormal happens. Then contact a qualified electrician.
Do not dispose of electrical appliances as unsorted municipal waste, use separate collection facilities. Contact your local government for information regarding the collection systems available.
GENERAL WARRANTY TERMS
- The warranty is valid only on the presentation of the invoice of purchase.
- The warranty does not cover damages for personal injury or damage caused directly or indirectly in any capacity whatsoever.
THE WARRANTY EXPIRES
- With the modification or disappearance of the nameplate of the appliance.
TECHNICAL ASSISTANCE
For technical assistance requests, our services are available through the following contacts:
- Telef. 00 351 252 910351
- Fax: 00 351 252 910367
- E-mail: assistencia@jocel.pt
- http://www.jocel.pt
We declare our responsibility for the machine indicated below
- Product DEHUMIDIFIER
- Brand JOCEL
- Model JDE011121
Complies with the following European directives and standards implementation
- Low Voltage 2006/95/CE
- Electromagnetic Compatibility 2004/108/CE
- Country of Origin: P.R.C.