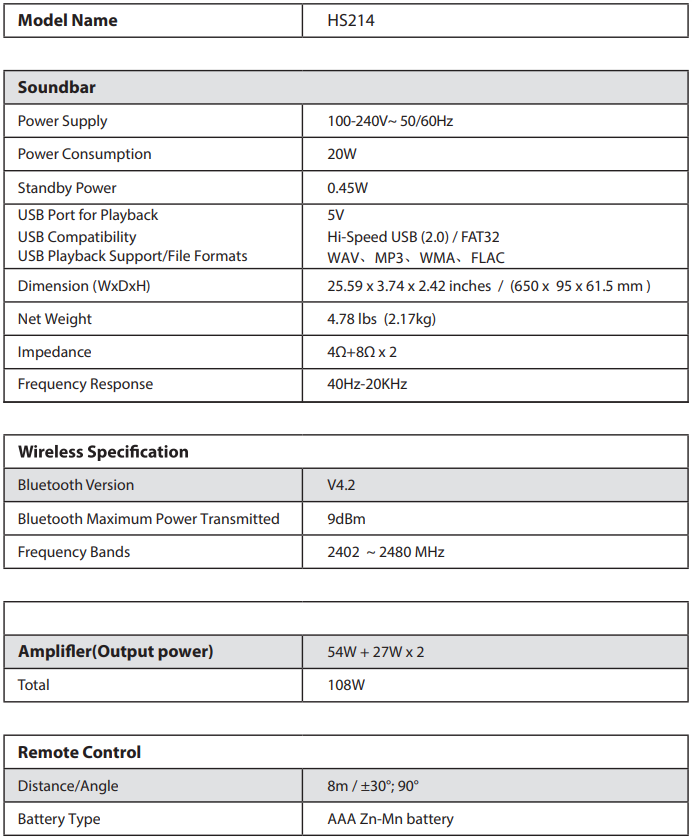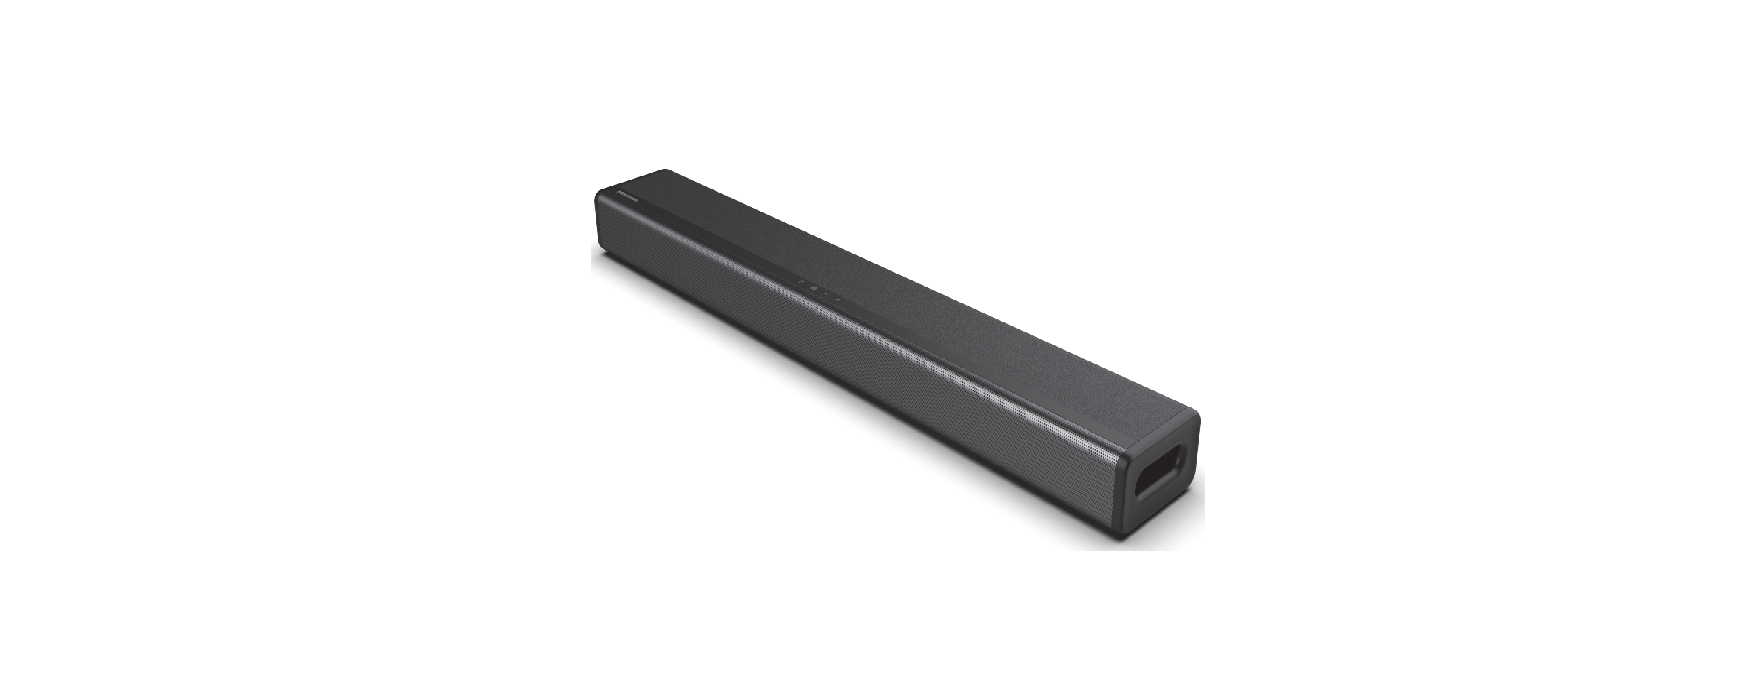
Hisense HS214 2.1 Channel Sound Bar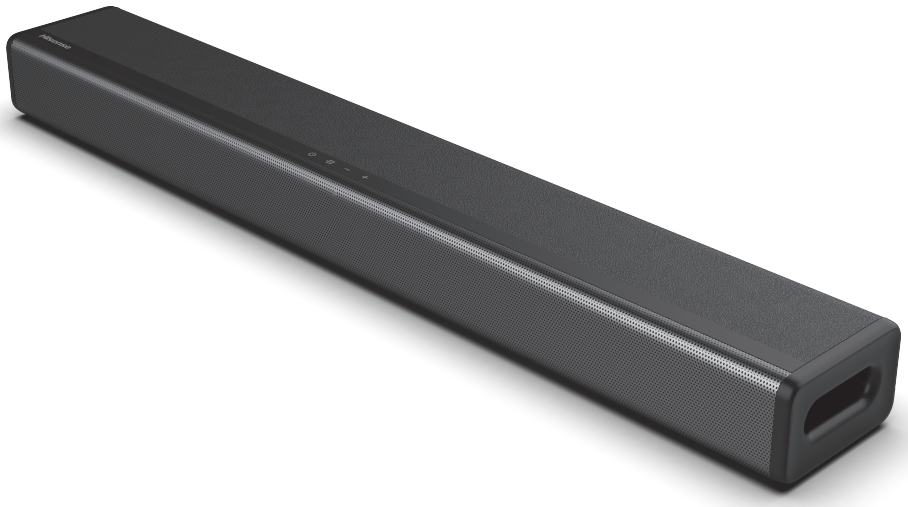
Package Contents 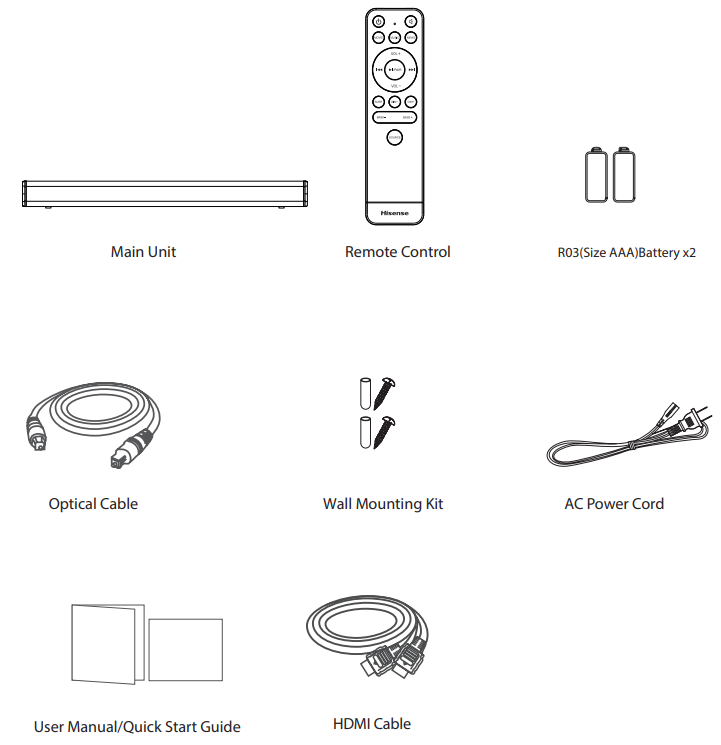
- Design and specifications are subject to change without notice.
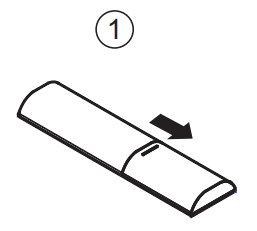
- Push the tab on the side of the battery tray towards the tray and then pull the battery tray out of the remote control.
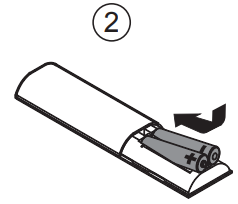
- Remove the old batteries. Place 2 x new AAA batteries into the battery tray with the correct polarity (+/-) as indicated.
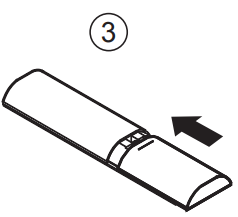
- Slide the battery tray back into the slot in the remote control.
Precautions Concerning Batteries
- If the batteries leak, wipe away the leakage inside the battery compartment and replace the batteries with new ones. Do not use any batteries other than those specified. Do not heat or disassemble batteries.
- Keep away from heat or moisture.
- Do not carry or store batteries with other metallic objects. Doing so could cause batteries to short-circuit, leak, or explode.
Placement and Mounting
Placement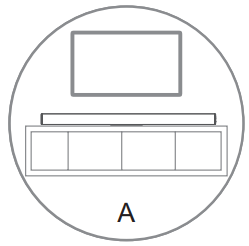
- If your TV is placed on a table, you can place the unit on the table directly in front of the TV stand, centered on the TV screen.
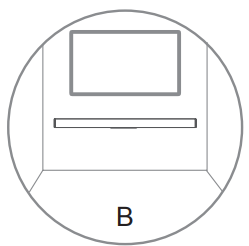
- B If your TV is attached to a wall, you can mount the unit on the wall directly below the TV screen.
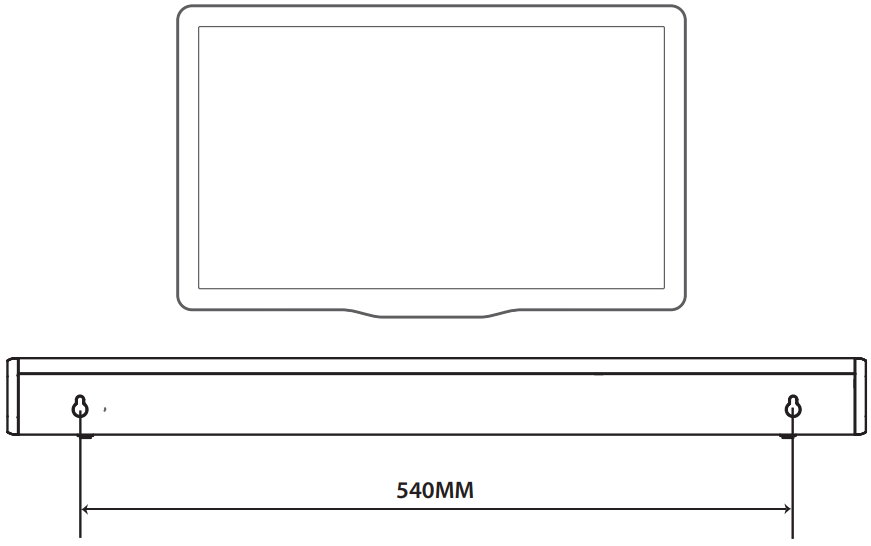
Wall Mounting (if using option B)
Note:
- Do not overtighten screws.
- Keep this instruction manual for future reference.
- Use an electronic stud finder to check the wall type before drilling and mounting.
Connections
Connect to COAXIAL Socket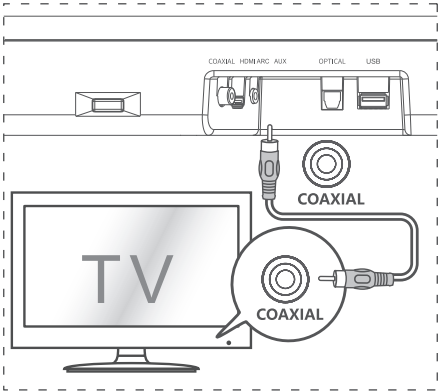
- You can use a COAXIAL cable (not included) to connect the TV’s COAXIAL OUT socket and the COAXIAL socket on the unit.
Tip:
- While in OPTICAL, HDMI ARC, or COAXIAL mode, if there’s no sound output from the unit, you may need to activate PCM signal output on your source device (eg. TV, DVD, or Blu-ray player).
Connect to HDMI ARC Socket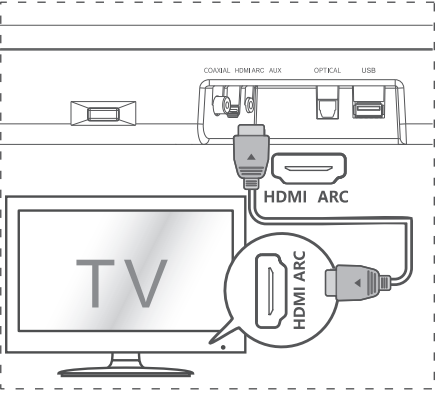
Your Soundbar supports HDMI with an Audio Return Channel (ARC). If your TV is HDMI ARC compliant, you can hear the TV audio through your Soundbar by using a single HDMI cable.
- Use a High-Speed HDMI cable to connect the HDMI ARC connector on your Soundbar and the HDMI ARC connector on the TV. The HDMI ARC connector on the TV might be labeled differently. For details, see the TV user manual.
- On your TV, turn on HDMI-CEC operations. For details, see the TV user manual.
Tips:
- Your TV must support the HDMI-CEC and ARC functions. HDMI-CEC and ARC must be set to On.
- The setting method of HDMI-CEC and ARC may differ depending on the TV. For details about the ARC function, please refer to your TV user manual.
- Only HDMI 1.4 compatible cables can support the ARC function.
Connect to AUX Socket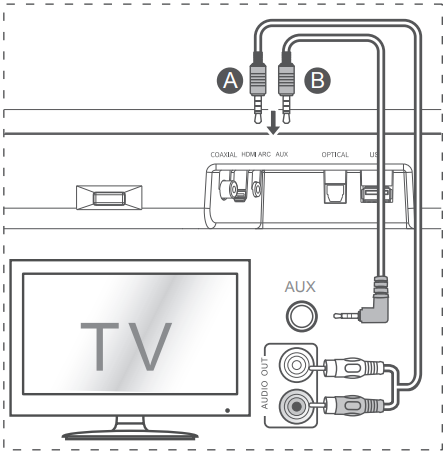
- Use an RCA to 3.5mm audio cable (not included) to connect the TV’s audio output socket and the AUX socket on the unit.
- B Use a 3.5mm to 3.5mm audio cable (not included) to connect the TV’s or external audio device Aux socket to the Aux socket on the unit.
Connect to OPTICAL Socket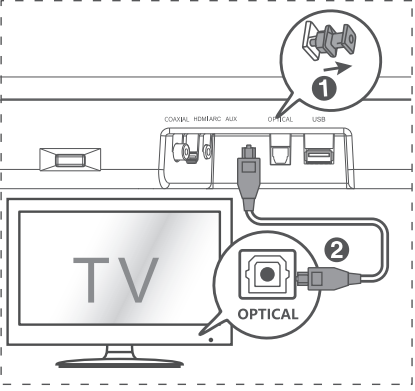
- Remove the protective cap of the OPTICAL socket, then connect an OPTICAL cable (included) to the TV’s OPTICAL OUT socket and the OPTICAL socket on the unit.
Connect Power Risk of Product Damage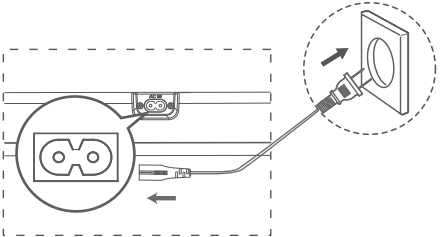
- Ensure that the power supply voltage corresponds to the voltage printed on the back or the underside of the unit.
- Before connecting the AC power cord, ensure you have completed all other connections.
- Connect the mains cable to the AC Socket of the main unit and then into a mains socket.
Basic Operation
Standby/On
When you first connect the main unit to the main socket, the main unit will be in STANDBY mode.
- Press the button on the unit or on the remote control to switch the unit ON.
- Press the button again to switch the unit back to STANDBY mode.
- Disconnect the mains plug from the mains socket if you want to switch the unit OFF completely. Auto
How to Enable Auto Wake
- Short press the (SOURCE) button and + (VOL + button on the unit to enable or disable the Auto Wake function.
- Auto Wake On white and green LED blinks twice sequentially. While in STANDBY mode, the RED LED is breathing.
- Auto Wake Off: white and red LED blink twice sequentially. While in STANDBY mode, the LED is in solid red.
Automatic Power-Off Function
- To switch the unit off completely, disconnect the mains plug from the mains socket.
- Please turn the unit off completely to save energy when not in use.
Select Modes
Press the (SOURCE) button repeatedly on the unit or the SOURCE button on the remote control to select the desired mode. The LED indicator on the front of the main unit will show which mode is currently in use.
Adjust the Volume
Press the + / – buttons on the unit or VOL+ / VOL- on the remote control to adjust the volume. If you wish to turn the sound off, press the mute button on the remote control. Press the mute button again or press the + / – buttons on the unit or VOL+ / VOL- on the remote control to unmute.
Note: While adjusting the volume, the status LED indicator will flash once. When the volume has hit the maximum/minimum value level, the status LED indicator will flash quickly.
Select a Preset Sound Effect
While playing, press the NEWS / MOVIE / MUSIC buttons on the remote control to select the preset equalizers:
- MOVIE (recommended for watching a movie)
- MUSIC (recommended for listening to music)
- NEWS (recommended for listening to the news)
OPTICAL/ COAXIAL/HDMI ARC /AUX Operation
- Ensure that the unit is connected to the TV or audio device.
- Press the button repeatedly on the unit or the SOURCE button on the remote control to select the OPTICAL, COAXIAL, HDMI ARC, and AUX modes.
- Operate your audio device directly for playback features.
- Press the +/– button on the unit or VOL+ / VOL on the remote control to adjust the volume to your desired level
Tip:
- While in OPTICAL, HDMI ARC, or COAXIAL mode, if there’s no sound output from the unit, you may need to activate PCM signal output on your source device (eg. TV, DVD, or Blu-ray player).
- For the digital audio out that the unit does not support, the LED light would be purple and blink three times.
Bluetooth Operation
Pair Bluetooth-enabled Devices
The first time you connect your Bluetooth device to this unit, you need to pair your device to this unit.
Note:
- The operational range between this unit and a Bluetooth device is approximately 26 feet (8m) (without any object between the Bluetooth device and the unit).
- Before you connect a Bluetooth device to this unit, ensure you know the device’s capabilities.
- Compatibility with all Bluetooth devices is not guaranteed.
- Any obstacle between this unit and a Bluetooth device can reduce the operational range.
- If the signal strength is weak, your Bluetooth receiver may disconnect, but it will re-enter pairing mode automatically.
To disconnect the Bluetooth function, you can
- Switch to another source on the unit.
- Disable the function from your Bluetooth device. The Bluetooth device will be disconnected from the unit after the audio prompt.
- Press and hold the I/PAIR button on the remote control.
Tips:
- Enter “0000” for the password if necessary.
- If no other Bluetooth device pairs with this unit within two minutes, the unit will recover its previous connection.
Listen to Music from a Bluetooth Device
- If the connected Bluetooth device supports an Advanced Audio Distribution Profile (A2DP), you can listen to the music stored on the device through the unit.
- If the device also supports an Audio Video Remote Control Profile (AVRCP), you can use the unit’s remote control to play music stored on the device.
- Pair your device with the unit.
- Play music via your device (if it supports A2DP).
- Use the supplied remote control to control play (if it supports AVRCP).
- To play/pause, press the PAIR button on the remote control.
- To skip a track, press the buttons on the remote control.
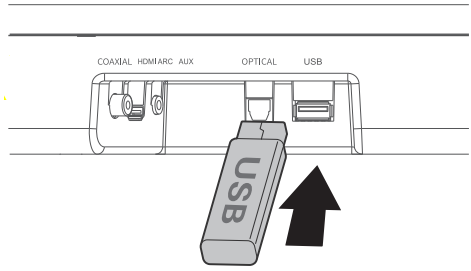
USB Operation
- Insert a USB device.
- Press the button repeatedly on the unit or press the SOURCE button on the remote control to select USB mode.
- During playback:
- To play/pause, press the PAIR button on the remote control.
- To skip to the previous/next track, press the buttons on the remote control.
Tip:
- The unit can support USB devices with up to 64 GB of memory.
- unit can play MP3.
- This unit can support WAV/WMA/FLAC.
- supports FAT32.
- Embedded USB full-speed host for USB applications should not exceed 6.5Mbps.
- For the File in FLAC format, the max block size 8107/8109 can support 4608 as the maximum.
Troubleshooting
To keep the warranty valid, never try to repair the unit yourself. If you encounter problems when using this unit, check the following points before requesting service.
power
- Ensure that there is power at the AC outlet.
- Press the standby button to turn the unit on.
The remote control does not work
- Before you press any playback control button, first select the correct source.
- Reduce the distance between the remote control and the unit.
- Insert the batteries with its polarities (+/-) aligned as indicated.
- Replace the batteries.
- Aim the remote control directly to the sensor in the front of the unit and there is no obstacle between the remote control and the unit.
sound
- Increase the volume. Press VOL+ on the remote control or + on the unit.
- Press the SOURCE button to select a different input source. When using either of the Digital inputs, if there is no audio:
- Try setting the TV output to PCM or
- Connect directly to your Blu-ray/other source, some TVs do not pass through digital audio.
I can’t find the Bluetooth name of this unit on my Bluetooth device for Bluetooth pairing
- Ensure you have paired the unit with your Bluetooth device.
This is a 15 mins power-function, one of the ERPII standard requirements for saving power
- Please increase the volume level of your external device.