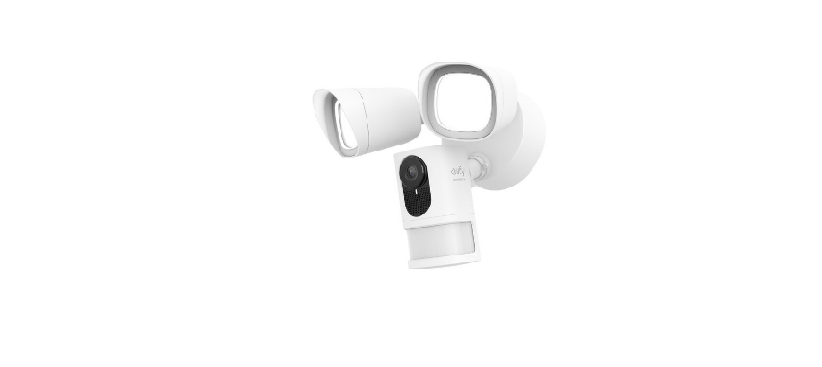
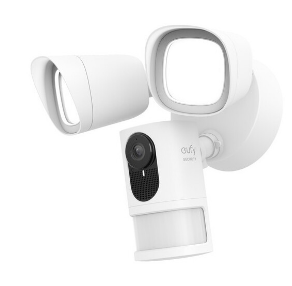
Eufy Floodlight Camera 2k
Eufy Floodlight Camera 2k User Manual.
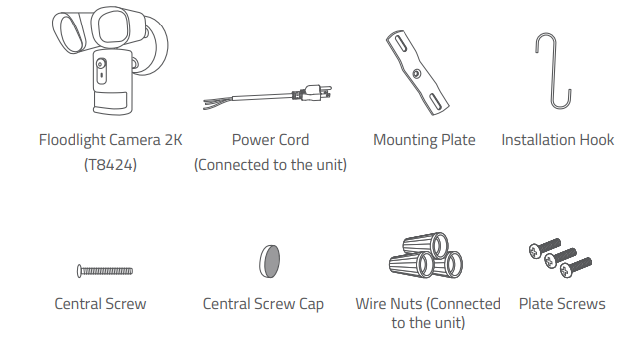
What’s in the Box
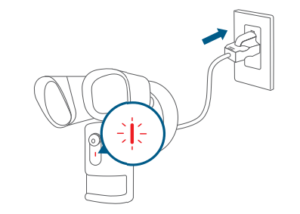
Power On the Floodlight Camera Indoors
- Connect the Floodlight Camera to a power source, and then wait 1 minute or until the LED indicator blinks red.
Get the Eufy Security App and Set up the Camera
Download the Eufy Security app from the App Store (iOS devices) or Google Play (Android devices).
Log in or sign up for a Eufy Security account, then follow the onscreen instructions to complete the setup.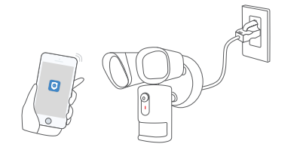
Mount Floodlight Camera Outdoors
Step 1
Unplug Floodlight Camera
Step 2
Unscrew the power cord; wire nuts will be used later. The power cord is not required when mounting the Floodlight Camera outdoors.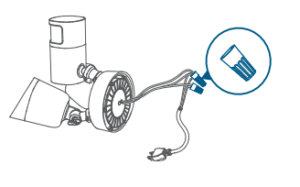
Step 3
Shut down the circuit breaker in your house. Switch on/off the lights to make sure the electricity in your house is properly shut off.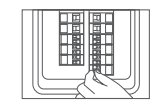
Step 4
Remove the old Floodlight from the junction box and install the mounting plate to the junction box.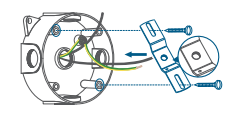
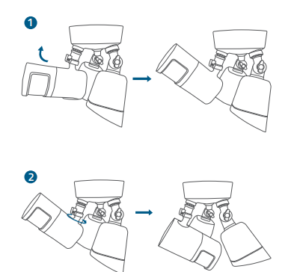
- Users can hang the Floodlight Camera upside down or install it vertically on the wall. Select the installation method that best suits the position of your junction box. If you plan to install the Floodlight Camera on the wall, please skip to Step 6.

- For upside-down installation, turn the camera down to the end when it’s placed vertically, then turn the camera 180° in a clockwise direction.
Step 6
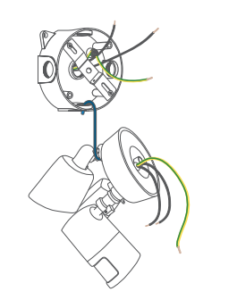
- Hang the Floodlight Camera on the junction box with the hook provided.
- Connect both ground wires(yellow or green) from the junction box and Floodlight Camera, and join the wires by using a wire nut. If the existing ground wire has been connected to the junction box or there’s no ground wire, connect the ground wire of the Floodlight Camera to the junction box or mounting plate directly.
- Use wire nuts to connect Floodlight Camera wires to the rest of the wires from the junction box. Connect the white wire on the Floodlight Camera to the white wire(neutral) from the junction box. Connect the black wire on the Floodlight Camera to the black wire(hot) from the junction box.
Step 7
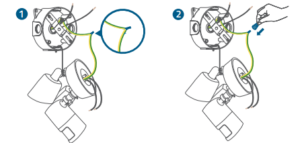
Insert the central screw through the center of the Floodlight Camera and screw it tightly.
Use the central screw cap to cover the central screw to prevent the central screw from rusting.
Step 8
After installation is complete, you can turn the camera knobs on Floodlight Camera to adjust the camera to your desired angle.
Step 9
Switch on the main circuit breaker in the house. To check whether the Floodlight Camera is operating, check if the LED indicator has turned solid white
NOTICE
FCC Statement
This device complies with Part 15 of the FCC Rules. Operation is subject to the following two conditions: (1) this device may not cause harmful interference, and (2) this device must accept any interference received, including interference that may cause undesired operation.
However, there is no guarantee that interference will not occur in a particular installation. The following importer is the responsible party:
- Company Name: POWER MOBILE LIFE, LLC
- Address: 400 108th Ave NE Ste 400, Bellevue, WA 98004-5541
- Telephone: 1-206-383-8247
Declaration of Conformity
Hereby, Anker Innovations Limited declares that this device complies with the essential requirements and other relevant provisions of Directive 2014/53/EU. For the declaration of conformity, visit the Web site: https://www.eufylife.com/. This product can be used across EU member states. Do not use the Device in an environment at too high or too low temperature, and never expose the Device to strong sunshine or too wet environment.
Customer Service
- Warranty
- 12-month limited warranty
- Call Us
- United States +1 (800) 988 7973 Mon-Fri 9 AM-5 PM (PT)
- United Kingdom +44 (0) 1604 936 200 Mon-Fri 6AM-11AM (GMT)
- Germany +49 (0) 69 9579 7960 Mon-Fri 6:00-11:00
- Email Us
- Customer Support: support@eufylife.com