
Cuisinart PRS-50 Pasta Roller and Cutter Set
IMPORTANT SAFEGUARDS
When using electrical appliances, basic safety precautions should always be taken, including the following:
- READ ALL INSTRUCTIONS BEFORE USING.
- Turn off and unplug the Cuisinart® Stand Mixer before fixing or removing the Pasta Roller or Cutter Attachments, after use, and before cleaning.
- Avoid contact with moving parts and fitted attachments. To reduce the chances of bodily injury and/or damage to the stand mixer or pasta maker attachments, keep hands, clothing, cooking utensils, etc., away from the moving parts during operation.
- The use of attachments not recommended or sold by Cuisinart may cause free, electric shock or injury.
- Do not use more than one attachment at a time.
- Do not use this attachment for anything other than its intended use.
- Do not use outdoors.
- To protect against the risk of electric shock, do not put the power unit in water or other liquids.
SAVE THESE INSTRUCTIONS FOR HOUSEHOLD USE ONLY
UNPACKING INSTRUCTIONS
- Place the gift box containing your Cuisinart® Pasta Roller and Cutter Set on a fat sturdy surface before unpacking.
- Lift the corrugated insert out of the gift box. Remove the body, Pasta Roller, Fettuccine Cutter, and Spaghetti Cutter.
To assemble the pasta maker attachments, follow the instructions on page 5. Replace all packaging materials inside the box and save the box for repackaging. Before using it for the first time: Wipe all parts according to Cleaning and Maintenance on page 7. Do not immerse or run underwater.
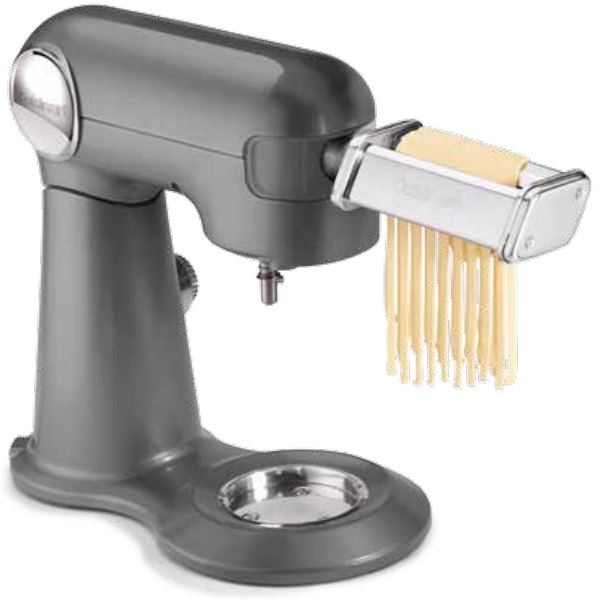
PARTS AND FEATURES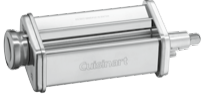
- Pasta Sheet Roller Rolls pasta dough into sheets to make lasagna or hand-cut pasta and to use with pasta cutters. The Thickness Adjuster Knob, located on the lift, Adjusts rollers to create thicker or thinner pasta sheets.
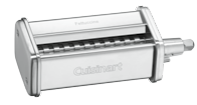
- Fettuccine Cutter Cuts pasta sheets into perfect strands for fettuccine.

- Spaghetti Cutter Cuts pasta sheets into this all-time favorite pasta.
Attaching Roller or Cutter to Stand Mixer
- Make sure the stand mixer is unplugged.
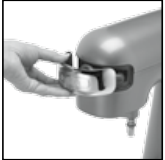
- Turn the attachment knob counterclockwise until the outlet opening is unobstructed.
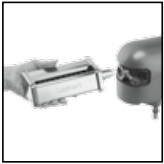
- Turn the attachment back and forth slightly until the knob slips into the notch and the attachment locks into place.
 Turn the knob clockwise to firmly secure to the mixer.
OPERATION
Rolling Pasta Sheets
- Prepare pasta dough as directed by the recipe.
- After the dough has rested and is ready to roll, set the roller to Setting 8.
- Cut the dough into four pieces, about 4 to 5 ounces each. Cover the dough with plastic wrap or a damp paper towel so it doesn’t dry out.
- Flatten one piece of dough into a disk about ¼ inch thick. Set the stand mixer to Speed 3 or 4.
- Once the pasta sheet is silky smooth and pliable, use the knob to set the pasta roller to Setting 7 and pass the pasta sheet through twice.
Making Fettuccine or Spaghetti
- Attach the desired pasta cutter to the stand mixer as instructed previously.
- Turn the mixer to Speed 4 and slowly insert the dusted pasta sheet.
- Cook immediately or store in plastic bags and keep refrigerated for up to 3 days.
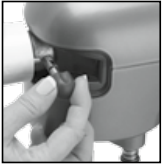
NOTE:
After you finish rolling out sheets or making fettuccine or spaghetti, remove the attachment, tighten the attachment knob, then replace the port cover on your stand mixer.
Tips and Hints
- When measuring ingredients to prepare the pasta dough, it is essential to stir the flour before you measure it. Do not scoop it right out of the bag.
- The key to making fresh pasta is to have the right feel of the dough. The dough mustn’t be too moist or too dry. The dough should be pliable and come together in one ball yet should not be sticky to the touch.
- It may be necessary to experiment with a fresh egg pasta recipe a few times to get the feel of the dough and the pasta-making process.
- The humidity of the day can greatly affect the pasta dough. If the day is very humid, watch and feel the dough when you are finished kneading. If it is still sticky, knead in one tablespoon of four at a time until the stickiness disappears.
- When making fettuccini or spaghetti, separate pasta as soon as it is cut from the pasta maker. Toss freshly cut pasta with semolina four to prevent sticking. Pile semolina-dusted noodles together in loose bundles on a fat, clean surface.
CLEANING AND MAINTENANCE
- Remove the pasta roller or cutter from the stand mixer.
- Allow any residual dough on the attachment to dry before removing it with a small, firm bristle brush.
NOTE:
The pasta roller and cutters must be kept dry. Do not immerse in water, or spray with water, on any part of the attachments. Any other servicing should be performed by an authorized service representative.
Pasta Dough
The combination of “00” flour and semolina gives this dough the perfect bite when cooked, compared to traditional pasta dough made with just “00” flour. Makes about 1½ pounds of dough, enough for 8 servings
- 5 large eggs
- 2½ cups “00” flour
- 2⁄3 cup semolina flour
- Put all of the ingredients, in the order listed, into the Cuisinart® mixing bowl. Attach the dough hook and mix on Speed 4 to combine.
- Allow to mix until dough mostly comes together, about 4 to 6 minutes. At about 5 minutes of mixing, check the texture. If it is too dry, add water one tablespoon at a time; alternatively, if it is too wet, add the “00” four one tablespoon at a time to the desired consistency. Keep in mind, that this dough won’t resemble a smooth ball, it will only just come together in large chunks with some possible smaller bits to knead in by hand. Should any four or loose dry bits be left behind at the bottom of the bowl, leave them there and do not incorporate them into the final dough.
- Transfer dough to a lightly floured surface and knead all dough together into a ball by hand until smooth and it springs back to the touch, about 2 minutes.