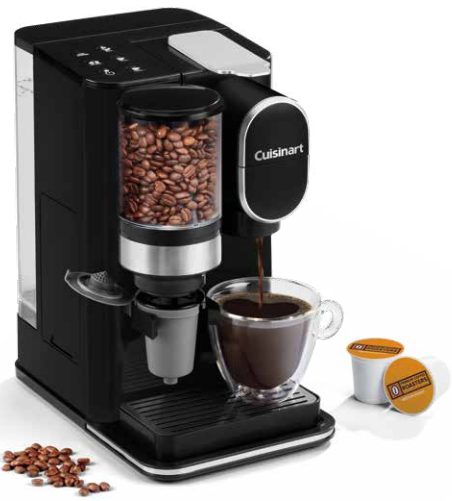
Cuisinart DGB-2 Grind & Brew Coffeemaker
IMPORTANT SAFEGUARDS
Read and Save the Cuisinart DGB-2 Grind & Brew Coffee maker User Manual. When using electrical appliances, basic safety precautions should always be taken to reduce the risk of fire, electric shock, and/or injury to persons, including the following:
- READ ALL INSTRUCTIONS.
- Do not touch hot surfaces. Use handles and knobs.
- To protect against fire, electric shock, and injury to persons, do not place cord, plug, or base unit in water or other liquids.
- Close supervision is necessary when any appliance is used by or near children or individuals with certain disabilities.
- Always unplug from the outlet when not in use and before cleaning. Allow to cool before putting on or taking off parts and before cleaning the appliance.
- Do not operate any appliance with a damaged cord or plug or after the appliance malfunctions or has been dropped or damaged in any manner. Return the appliance to the nearest Cuisinart Repair Center for examination, repair, or electrical or mechanical adjustment.
- The use of accessory attachments not recommended by Cuisinart may cause fire, electric shock, or injury to persons.
- Do not use outdoors.
- Do not let the cord hang over the edge of the table or counter or touch hot surfaces.
- Do not place on or near a hot gas or electric burner or in a heated oven.
- Always fill the water reservoir first, then plug the cord into the wall outlet. To disconnect, turn the power off, then remove the plug from the wall outlet.
- Do not use the appliance for anything other than its intended use.
- Water in the capsule chamber is very hot during the brew process. To avoid the risk of injury, do not lift the handle or open the capsule chamber during the brewing process.
- Do not overfill the water reservoir with water. Use only water in this appliance! Do not put any other liquids or foods in the water reservoir except as instructed in the cleaning instructions in this guide.
- Do not clean the drip tray with cleaners, steel wool pads, or other abrasive materials.
WARNING
TO REDUCE THE RISK OF FIRE OR ELECTRIC SHOCK, DO NOT REMOVE THE BASE PANEL. NO USER-SERVICEABLE PARTS ARE INSIDE.
- Avoid contact with moving parts.
- Check the grinder basket for the presence of foreign objects before using it.
- Use the coffee grinder to grind roasted coffee beans only. Grinding other substances, such as nuts, spices, or unroasted beans, may dull the blade and cause poor grinding or injury.
- Do not place a cloth or otherwise restrict airflow beneath the coffeemaker.
- Only use single-serve pods intended for this appliance. If the pod does not fit, do not force the pod into the appliance.
- Do not operate your appliance in an appliance garage or under a wall cabinet. When storing in an appliance garage, always unplug the unit from the electrical outlet. Not doing so could create a risk of fire, especially if the appliance touches the walls of the garage or the door touches the unit as it closes.
- WARNING: To avoid the risk of injury, do not open the brew chamber during the brew process.
- Cuisinart DGB-2 Grind & Brew Coffee maker User Manual.
SAVE THESE INSTRUCTIONS FOR HOUSEHOLD USE ONLY
WARNING: RISK OF FIRE OR ELECTRIC SHOCK
- The lightning flash with the arrowhead symbol within an equilateral triangle is intended to alert the user to the presence of dangerous uninsulated voltage within the product’s enclosure that may be of sufficient magnitude to constitute a risk of fire or an electric shock to persons.
- The exclamation point within an equilateral triangle is intended to alert the user to the presence of important operating and maintenance (servicing) instructions in the literature accompanying the appliance.
SPECIAL CORD SET INSTRUCTIONS
A short power-supply cord is provided to reduce the risks resulting from becoming entangled in or tripping over a longer cord. Longer extension cords may be used if care is exercised in their use. An extension cord is used, the marked electrical rating of the extension cord must be at least as great as the electrical rating of the appliance, and the longer cord should be arranged so that it will not drape over the countertop or tabletop where it can be pulled on by children or tripped over.
NOTICE
This appliance has a polarized plug (one blade is wider than the other). To reduce the risk of electric shock, this plug will fit into a polarized outlet only one way. If the plug does not fit fully into the outlet, reverse the plug.
IMPORTANT UNPACKING INSTRUCTIONS
- Place the box on a large, sturdy, flat surface.
- Remove any literature.
- After removing the coffeemaker, place the box out of the way and place the inserts back into the box.
- Remove the polybag covering the coffeemaker.Keep all plastic bags away from children.
THE QUEST FOR THE PERFECT CUP OF COFFEE
- ELEMENT 1 – WATER
Coffee is 98% water. The quality of that water is as important as the quality of your coffee. If water doesn’t taste good from the tap, it won’t taste good in your coffee. Cuisinart includes a charcoal water filter to remove chlorine, bad tastes, and odors, for the purest coffee flavor every time you brew. - ELEMENT 2 – COFFEE
While coffee is 98% water, the flavor comes mainly from the beans. To achieve the same great taste you enjoy at a coffee bar, buy only a two-week supply of fresh coffee beans at a time. - ELEMENT 3 – GRIND
The grind is critical for proper flavor extraction. If the grind is too fine, over-extraction and bitterness will result. Too fine a grind may also clog the filter. If the grind is too coarse, the water will pass through too quickly and the maximum flavor will not be extracted. Your coffeemaker is preset for medium grind, the optimal grind for this type of brewing process. - ELEMENT 4 – PROPORTION
Coffee that is too strong or too weak is always a disappointment. Follow the recommended portions in the instructions under Making Coffee, and later adjust the amount to your taste.
FEATURES AND BENEFITS
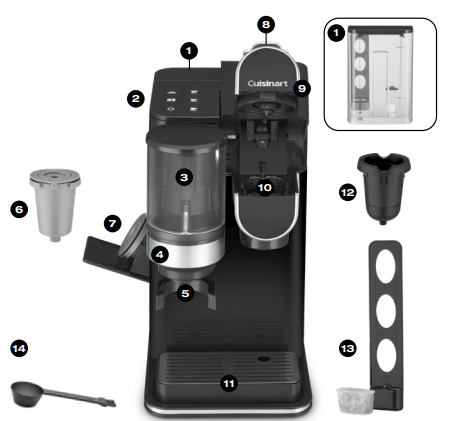
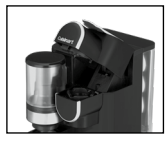
- Removable 48-Ounce
Water Reservoir - Control Panel
See detailed illustration on page 6 - Bean Hopper
Holds up to 100 g of beans. The sealed lid keeps beans fresh - Conical Burr Mill (not shown)
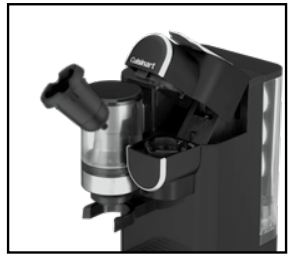
Removable for easy cleaning - HomeBarista® Holder
Keep the filter cup in place while grinding - HomeBarista® Reusable Filter Cup
- Reusable Filter Cup Compartment
Conveniently stores your HomeBarista® filter cup
Note: Insert HomeBarista® into the compartment upright shown in the image below - Brew Handle
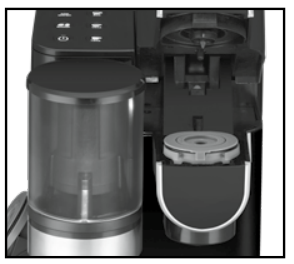
- Brew Head
- Brew Chamber
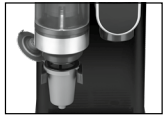
Holds removable capsule holder or HomeBarista® Reusable Filter Cup - Removable Drip Tray
- Removable Capsule Holder
- Charcoal Water Filter and Holder
Eliminates chlorine, bad taste, and odors from tap water. Holder keeps the filter firmly in place
NOTE: Follow the directions for preparing and inserting the filter on page 6 - Coffee Scoop/Brush
- Automatic Shutoff (not shown)
As a safety feature, your brewer will automatically shut off when it is idle for longer than 30 minutes. Press the Power button to restart.
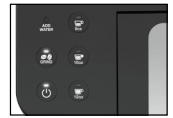
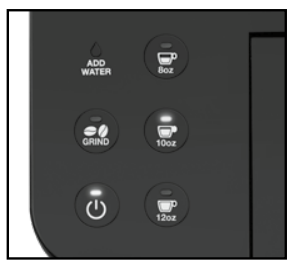
GETTING TO KNOW YOUR CONTROL PANEL
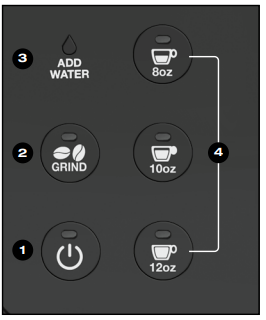
- Power ON/OFF
Press to turn the brewer on and off. - Grind Button
Press to automatically start or stop grinding coffee into the HomeBarista® Reusable Filter Cup. Turns off when grinding is complete. - Add Water Indicator
The indicator will illuminate Red when the water level is low. The indicator turns off when the water reservoir is filled past the minimum level. - Brew Size Buttons
Select from 8 oz., 10 oz., or 12 oz. cup size to begin brewing.
BEFORE BREWING YOUR FIRST CUP OF COFFEE
INITIAL CLEANING
Perform an initial cleaning before making your first beverage. Follow the instructions below without inserting a pod.
- Remove the reservoir from the unit.
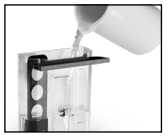
- Fill the reservoir and replace it with the unit.
- Plug the power cord into an independent outlet. Press the Power button to turn the unit on.
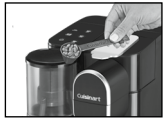
- Open and close the brew head. Do not add a capsule.
- Place a mug on the drip tray.
- Press the 10 oz. Brew Size button to begin the brew cycle. The selected indicator will start breathing and the hot water will start to dispense momentarily.
- When the one-time cleaning process is complete, discard the hot water. Your brewer will now be ready to use.
MAKING COFFEE WITH WHOLE BEANS
Follow the instructions in “Before Brewing Your First Cup of Coffee.”
GRINDING INTO THE HOMEBARISTA®
- Remove the bean hopper lid and add beans.
- Open the lid of the HomeBarista® Reusable Filter Cup and insert it into the holder below the grinder.
- Press the Power button to turn on the unit. The Power and Grind indicators will illuminate.
- Press the Grind button to start the grind process. The grinder is set to automatically turn off once the HomeBarista® Reusable Filter Cup is full.
BREWING WITH HOMEBARISTA
- Remove the water reservoir and fill to max fill line. Replace into the unit. If water is lower than the minimum fill, the Add Water indicator light will illuminate.
- Open the brew head lever and remove the capsule holder from the brewing chamber by pulling it toward you.
- Remove the HomeBarista® Reusable Filter Cup from the grinder holder. Make sure no grounds are remaining on the upper rim of the filter basket. Close the lid and place it into the brewing chamber. There is no need to snap it into place.
- When the brew head lever is closed, the Brew Size buttons will illuminate solid. Press the desired cup size to begin brewing.
- When the brewing process is complete, all Brew Size buttons will go off. The Grind button will remain on for use until the brew head lever is opened to begin the brewing process
- After brewing, raise the handle and remove the HomeBarista® Reusable Filter Cup. Use caution, as the reusable coffee capsule will be hot.
- Replace the capsule holder, ensuring that the arrow on the capsule holder rim aligns with the arrow on the brewing chamber. Gently push the capsule holder to snap into place.
- After use, open HomeBarista®. Remove the filter basket from the holder, discard the grounds, and rinse out the filter basket and holder. When thoroughly dried, the HomeBarista® can be put into the compartment for easy storage.
NOTE: HomeBarista® parts can be cleaned with warm soapy water and are dishwasher safe, top rack only.
TIPS AND HINTS
- If you buy large portions of beans, separate them into one-week portions and store them in airtight containers in the freezer. Preserve freshness by minimizing exposure to air, light, and moisture. Once beans are removed from the freezer, keep them in a sealed container at room temperature.
- Some experts feel freezing dark-roast beans can cause oils to coagulate; others disagree. You’ll need to decide for yourself!
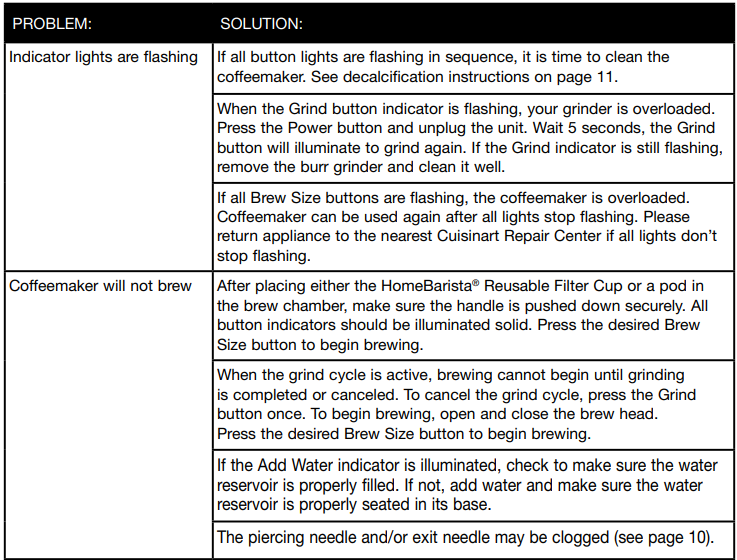
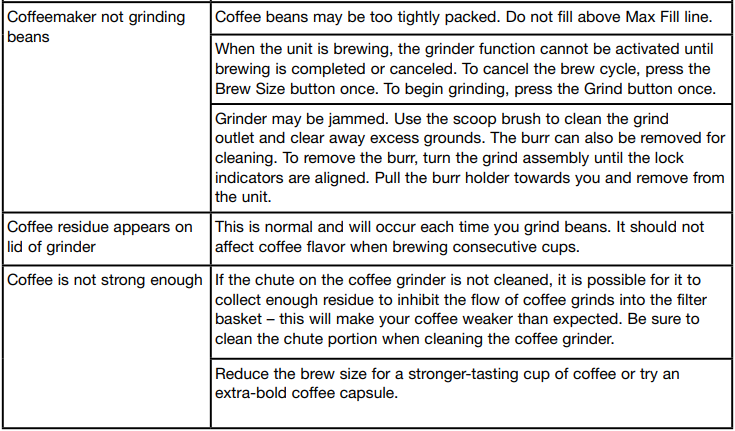
TROUBLESHOOTING
WARRANTY
Limited 3-Year Warranty
This warranty is available to U.S. consumers only. We warrant that your Cuisinart® Grind & Brew Single-Serve Coffeemaker will be free of defects in materials and workmanship under normal home use for 3 years from the date of original purchase. We recommend that you visit our website,https://cuisinart.registria.com, for a fast, efficient way to complete your product registration. If you do not have proof of purchase date, the purchase date for purposes of this warranty will be the date of manufacture.
HASSLE-FREE REPLACEMENT WARRANTY
Your ultimate satisfaction with Cuisinart products is our goal, so if your Cuisinart® Grind & Brew Single-Serve Coffeemaker fails within the generous warranty period, we will repair it or, if necessary, replace it at no cost to you. To obtain a return shipping label, please complete the product inquiry form at www.cuisinart.com/customer-care/product-assistance/productinquiry. Or call our Consumer Service Center toll-free at 1-800-726-0190 to speak with a representative.
Important: If the nonconforming product is to be serviced by someone other than Cuisinart’s Authorized Service Center, please remind the servicer to call our Consumer Service Center at 1-800-726-0190 to ensure that the problem is properly diagnosed, the product is serviced with the correct parts, and the product is still under warranty.
©2021 Cuisinart
Stamford, CT 06902
Printed in China