Avantek B06Y21NV8B Doorbell Kit
Thank you for purchasing this product. To ensure proper use and trouble-free operation, please read this Avantek B06Y21NV8B Doorbell Kit User Manual carefully and store it in a safe place for future reference.
Introduction
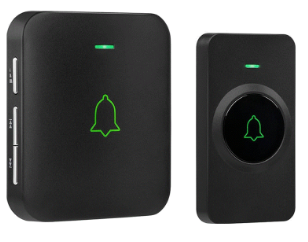
This doorbell kit includes one transmitter and one battery-powered receiver. It is battery-powered and requires no wiring work, making setup a breeze. Featuring 52 tunes and melodies with an adjustable volume control, the doorbell kit suits many different circumstances. It can be expanded for further coverage and convenience. Add it to your home, office, shop, etc., and be immediately informed whenever there is a visitor.
Package Contents
- 1 × Transmitter (battery included)
- 1 × Battery-powered receiver(3 AAA batteries included)
- 4 × Anchors
- 4 × Screws
- 1 × Key
- 1 × Adhesive patch
- 1 ×Mounting bracket
- 1 × User manual
Technical Specifications
- Receiver Battery Voltage DC 3×1.5 V
- Chime Loudness ≤120 dB
- Transmission Frequency 433.91 MHz
- Transmitter Battery Type CR2032 Lithium coin cell
- Operating Temperature Range Transmitter: -10 to 60 °C; Receiver: 0 to 50 °C
- Transmitter Battery Life Up to 3 years (10 rings per day)
- Receiver Battery Life Up to 1 year (10 rings per day)
Product Overview
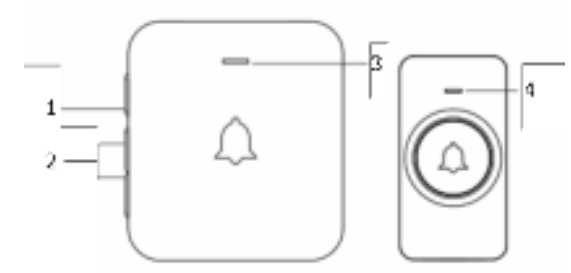
- Volume Button
- Chime Selection Buttons
- Receiver LED
- Transmitter LED
- Battery Compartment
- Battery Compartment Cover
- Mounting Bracket
Features
- Utilizing a3 V lithium coin cell, the transmitter is estimated to last up to 3 years when used 10 times per day without battery replacement.
- The transmitter is IP55 dustproof and waterproof, suitable for various outdoor environments.
- The doorbell boasts a massive wireless range of up to 300 m.
- For enhanced convenience, the receiver is designed with chime selection buttons for easy selection from among amongthe rich selection of 52 chimes. Five volume levels can be easily adjusted using the volume button.
- The memory function of the receiver remembers your previous melody and volume level even after re-installing the battery.
- The receiver uses 3 AAA batteries and features highly efficient power management for low power consumption and enhanced battery life.
- The receiver features a low battery power reminder via LED notification and will check the battery level each time the battery is replaced.
Installation
Transmitter Battery Unsealing
Before first use, gently pry open the rear cover of the transmitter and peel off the seal on the button cell. Ensure the correct polarity of the battery and close the battery compartment cover.
Transmitter Installation
To ensure sufficient wireless range, do not install the transmitter close to metals. Adhesive Tape (recommended for water resistance)
- Apply the double-sided adhesive patch to the back of the transmitter.
- Remove the outer side of the patch, attach the transmitter to the desired location, and press it firmly for 30 seconds.
Anchored Screws
- Gently pry open the rear cover of the transmitter and drill out the marked screw holes.
- Drill holes for the screws at the desired location and insert the anchors.
- Attach the rear cover to the wall by tightening it with the screws.
- To ensure resistance against water, seal the screw holes with silicone.
- Attach the transmitter to the screwed-on back cover.
Receiver Installation
Choose an installation location with as few obstacles to the transmitter(s) as possible.
- Drill holes at the desired location and insert the anchors.
- Attach the mounting bracket to the wall by tightening it with the screws.
- Hook the receiver onto the mounting bracket.
Operating Instructions
Transmitter and Receiver Pairing
- Install 3 AAA batteries into the receiver. Adjust the volume level with the volume button if the receiver doesn’t ring while flashing.
- Press and hold the volume button on the receiver for 3 seconds. The transmitter LED will blink either green or red to indicate the pairing mode channel. Press any button on the receiver or wait for 60 seconds to exit pairing mode.
- Press the transmitter button to pair it with the receiver. The“ding-dong” chime indicates a successful pairing. From now on the receiver LED will light up with the color that was blinking during pairing with the paired transmitter.
Chime Selection
There are 52 chimes to choose from with this doorbell kit. Simply press the chime selection buttons repeatedly to select one you prefer, saving you the hassle of cycling through the whole list if you accidentally miss your desired chime.
VolumeAdjustment
There are five volume levels in total with the minimum volume level being silent. Press the volume button repeatedly to cycle through the volume levels and set one to suit your needs.
Maintenance and Care
Transmitter Battery Replacement
When the transmitter connection starts to fail, it is time to replace the battery. Gently pry open the rear cover of the transmitter and replace it with the battery of type CR2032 according to the polarity markings.
Receiver Battery Replacement
Open the battery compartment and replace 3 type AAA batteries according to the polarity markings.
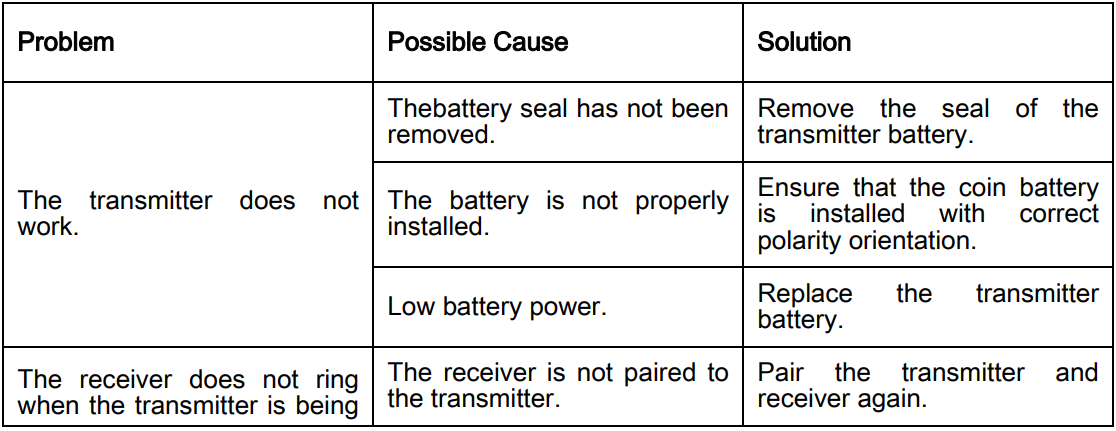
Troubleshooting
![]()
FCC Statement
This equipment has been tested and found to comply with the limits for a Class B digital device, under Part 15 of the FCC Rules. These limits are designed to provide reasonable protection against harmful interference in a residential installation. This equipment generates uses and can radiate radio frequency energy and, if not installed and used by the instructions, may cause harmful interference to radio communications.
- Reorient or relocate the receiving antenna.
- Increase the separation between the equipment and the receiver.
- Consult the dealer or an experienced radio/TV technician for help.
Changes or modifications not expressly approved by the party responsible for compliance could void the user’s authority to operate the equipment. This device complies with part 15 of the FCC Rules. Operation is subject to the following two conditions:
- This device may not cause harmful interference, and
- this device must accept any interference received, including interference that may cause undesired operation.